Spiacenti, questo articolo di supporto non è al momento tradotto in italiano. Se lo desideri, puoi provare una traduzione basata su Google.
Questo articolo di aiuto è per una versione precedente di Direct Mail.
You can add a text block to your message if you are using a modern template.
- Choose Insert Content > Text from the message editor toolbar
- Click the location in your message where you want the text to appear
Using text styles
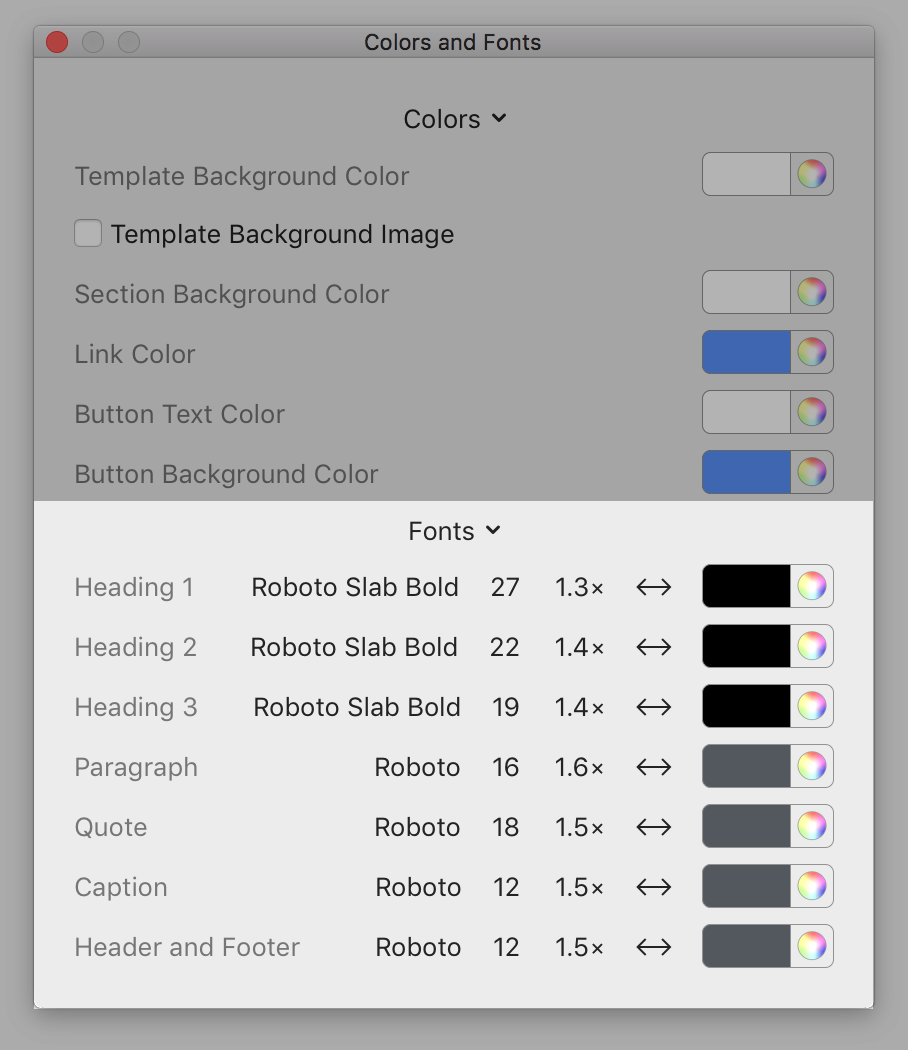
We recommend formatting your text using Direct Mail's built-in text styles. This means that instead of assigning fonts, colors, and sizes directly to your text, you instead assign semantic labels (like "heading", "paragraph", "caption", etc.) to your text. Then, you can use the "Fonts & Colors" panel to define the fonts, colors, sizes, etc. for each one of those labels. This makes for more consistent, professional, and attractive formatting across your entire message. Plus, if you decide later to change the font, color, or size for a particular style, you only need to change it in one place (the "Fonts & Colors" panel) and all the text in your message will instantly adopt the new formatting.
You can find all of the available text styles in the message editor toolbar, next to the "Insert Content" button.

You can choose from the following styles:
- Heading 1
- Heading 2
- Heading 3
- Paragraph
- Caption
- Quote
- Header or Footer
To apply a text style to a selection of text:
- Select the text that you want to apply a style to
- Choose a text style from the popup menu in the message editor toolbar (or from the Format > Font menu at the top of your screen)
Editing text styles
You can edit the formatting for a given text style in the "Fonts & Colors" panel:

- Click the "Fonts & Colors" button in the message editor toolbar
- Choose the font, size, line spacing, character spacing, and color for the style
- If desired, you can choose from a list of professionally-curated font combinations by clicking on the "Fonts" popup menu in the Fonts & Colors panel.
As you make changes, your message is updated automatically to reflect the new styles.
Custom Formatting
If you have a selection of text that needs custom formatting (like bold text, or underlining, a different color, etc.) you can use the formatting options in the message editor toolbar:

Additional options (like baseline or writing direction) can be found in the Format > Font menu at the top of your screen.
Note that some fonts do not include bold or italic variants. If the font you are using does not include bold or italic variants, those buttons will be grayed out in the toolbar.